

Buying an ugly, old, tray and transforming it into something beautiful brings me joy.
I love simple pleasures, and taking something that was heading for the trash and turning it into a treasure for under one dollar is simple bliss.
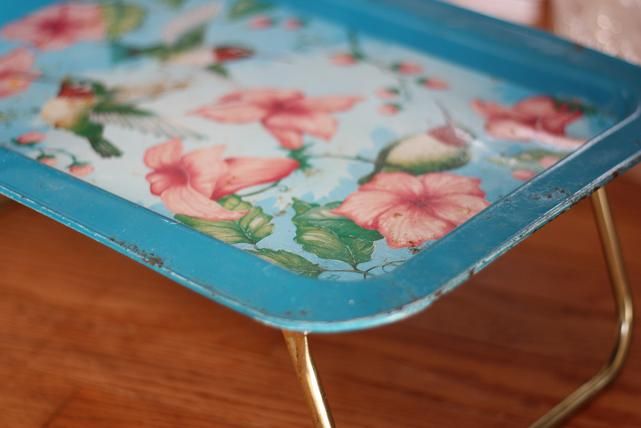
When I saw this old tray at a yard sale, I almost walked right past it. But then the “thinking outside the box” mentality kicked into full gear, I found out it was $0.25, and I snatched it up with joy.
“Can you paint an old, metal tray?” you may ask.
Absolutely, it’s so easy!
I knew that not only would I enjoy it, but it would make a wonderful gift to leave when I share a meal with someone.
I washed and brushed the tray down to remove the extra dirt and flaking paint/rust. This is the most important step and the one everyone wants to skip over. Brush or use sand paper to get as much rust off as you can.
I then primed it with spray paint primer, and once dried, I followed with my favorite Rustoleum Heirloom White spray paint. It’s been a favorite of mine for years.
Just one can has covered many trays and it’s still half full. (Yes, I’ve now found three other trays much uglier than this one.) 🙂
Coverage will vary based on the original color of the tray. If the original tray is a lighter color, one coat will be just fine.
You may choose to follow up with a protectant such as a wax or poly .
Just know that this is SO SIMPLE!! My readers know that you will be hooked on spray paint, I promise! The kids will have to get out of the way or they’ll be spray painted as well.
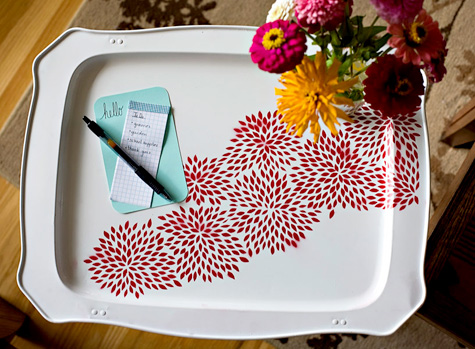
I love the stenciled addition as well.
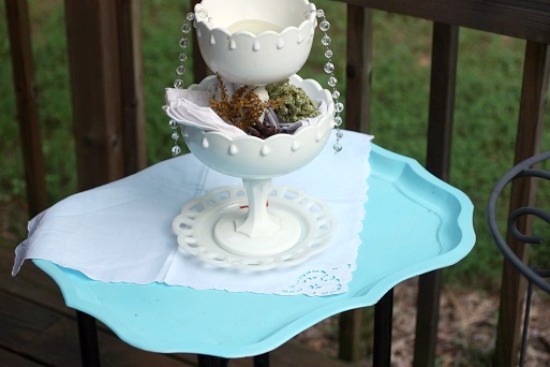
This gorgeous turquoise tray was an ugly rusted, should be thrown out, yard sale find that I converted in minutes. Check out my $8 + 60 Minutes = DIY Patio Redo
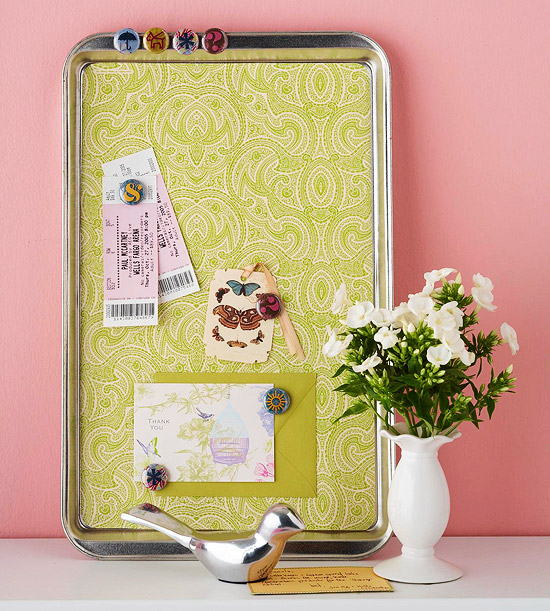
It’s so easy to create a magnetic board by painting an old tray and then lining it with with contact paper. This is just an old cookie sheet. Have you seen all my Cookie Sheet Ideas and Menu Planning Boards? I love them all.
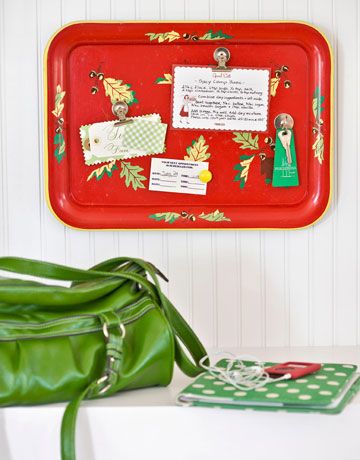
Country Living never fails with inspiring the vintage feel.
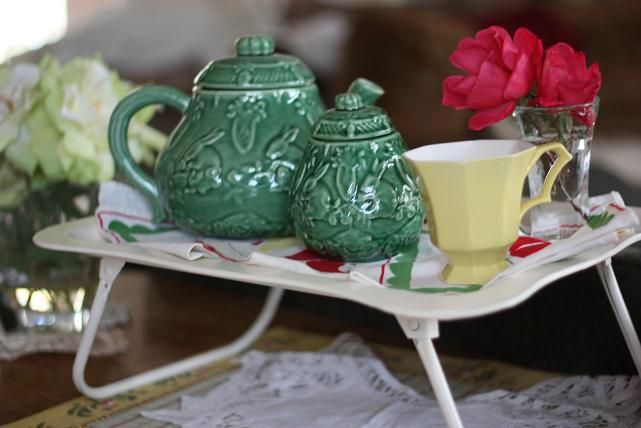
For your viewing pleasure, here is my completed tray with recent yard sale accessories for a grand total of $3. Yes, I admit, the tea pot may be smooshed on there, but I still love it.
Yellow teacups for 10 cents a piece, glass vase – $0.50, and the antique napkins ended up being a delightful surprise for pennies.
The matching tablecloth was the linen that I just loved; the eight napkins paired with it looked quite nasty…stained, brown etc. The elderly woman shared how this set was her grandmother’s. WHAT? Grandmother’s?
I knew I had found an heirloom, but honestly, I just took the napkins so I wouldn’t hurt her feelings. I had no intention of keeping them. Yet when I brought them home, I decided it wouldn’t hurt to soak them in Oxiclean, and then throw them in the washer on hot (with a touch of bleach). I was thrilled when they came out spotlessly beautiful.
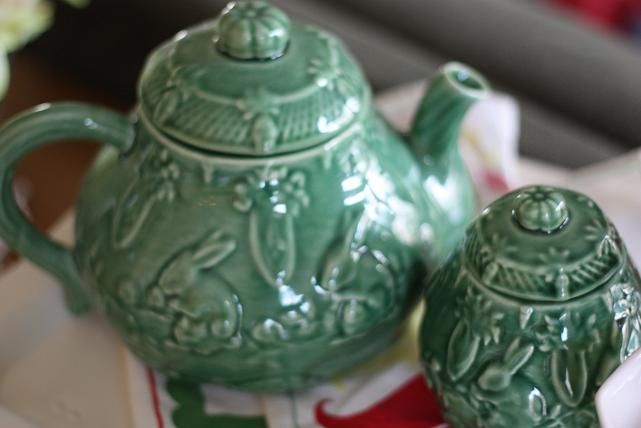
Finding this Bordallo Teapot and sugar holder at a yard sale last month was a highlight, finding out the cost was just $2… was priceless (almost :).
So, find yourself some old metal items, a little spray paint and a vision for the beautiful. You’ll experience a simple pleasure, trust me.


That is a good idea.
I would like to be more creative like that.
[Reply]
Your tray looks great as well as all the other goodies you have on it. Great finds, thanks for sharing. Stop by for a visit sometime.
Sandy
[Reply]
I never considered painting a tray!
My daughter has a Strawberry Shortcake tray she’s had for about 5 years. Since she’s 12 now, she’s not really into having snacks served to her friends in her room on it anymore. I had it in my garage sale pile, but I will pull out the spray paint primer and get to work!
[Reply]
How do you get your spray paint to stretch that far/last that long? My color of choice is matte black (looks similar to wrought iron), but I painted two small items with it – after priming them first – and the paint was GONE. At this rate, the paint itself gets expensive! None of the bloggers I read go through paint this fast, so I must be doing something wrong. What?
[Reply]
I’m dying to try out some of the spray paint ideas I’ve read in blogland – trays, furniture, chandeliers! But as it is 6 degrees today, I might have to wait!
[Reply]
Hey, girl! I loved your leather frugal fashion post, great finds!! You do find the bargains. I’ve found leather before too & it’s always exciting.
And good for you on the Bordallo green bunny pieces. I have both of those in my collection & you can bet they are a LOT more than $2 in the stores. Those were super finds! I have been lucky to find a few pieces out there to add to my collection too.
[Reply]
Great job! I love trays and my passion for spray paint is HUGE.
[Reply]
Lovely tray!! 🙂 I like the way you accessorized it too. 🙂 Isn’t spray paint a wonderful thing? 😉
[Reply]
I just discovered the Many Joys of Rustoleum paint this week! I love what you did with the trays. Now that I’ve worked with the paint myself (and it went well), I’ll be much more likely to tackle projects like this. Thanks for sharing! The tray is beautiful.
[Reply]
Girl, I never get tired of a great spray paint transformation – this one is so fab. Gotta LOVE that spray paint !
Ms. Kate
[Reply]
Such great finds! 🙂 Amazing what potential treasures others will get rid of!
Missed “visiting” with you the past month or so, I am happy to be back blogging!
Blessings,
Stacey
[Reply]
Great idea. Now if I could only learn from you how to go yard sale. I have no earthly idea. I guess I have a hard time thinking outside of the box!
[Reply]
Thanks for the inspiration! Here’s my first “Trash to Treasure” post on my blog!
http://theplacecalledhome.blogspot.com/2009/12/trash-to-treasure.html
[Reply]
Your tray came out great…just love your little teapot!
[Reply]
Nice work! I like the 25 cent price tag too!
[Reply]
Great idea -it’s so pretty and the price is unbelievable!
vickie
[Reply]
Wow…what a transformation! That is truly beautiful…and elegant!!! Great idea!
[Reply]
This is very inspirational. I had a similar project at my house: There was an old, rusted, nasty looking tray under the bathroom sink in our house when we moved in, and I primed and painted it and turned it into a magnetic board for my daughter’s alphabet magnets. It felt so great to renew an object that otherwise would have been thrown away. Blogged at http://simplehappyhome.wordpress.com/2009/05/19/repurpose-tray/.
I really like your lap tray idea – what a great way to give a special, pampering gift to someone you love.
[Reply]
I’ve been meaning to stop by and tell you thank you for sharing this inspirational idea! …so here I am! “Thank you!”
Happy New Year!
♥ Tamara ♥
…I have a giveaway on my blog…Hope you can join in!
[Reply]